
To remove water stains on leather shoes, use a dry cloth to absorb excess water. Remove any dirt with a dry microfiber. Dampen a clean rag with room temperature water, then use it to rub the stain out with gentle circular motions. Finish by applying a leather conditioner.
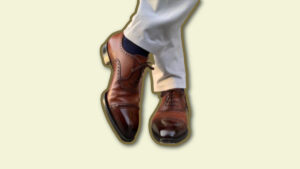
Water stains on nice leather shoes feel like a betrayal.
The same substance that’s usually a force for good (hydration, cleaning) has done an ultimate evil.
There are few things as unsightly as water stains on a pair of loafers or oxfords. It simply isn’t the kind of wear that adds character. It just looks sloppy and, frankly, pretty gross.
Fortunately, you don’t need a professional to fix this problem.
With just a few items you already have at home and a slightly deft hand, use the method below to get rid of the water stain on your leather shoes.
Table of Contents
What You’ll Need to Remove Water Stains from Your Leather Shoes
Here’s your arsenal for tackling those pesky water stains. You can actually use this technique on any leather item, be it a briefcase or wallet.
- A bowl of clean, room temperature water
- Several clean, undyed rags
- Smooth microfiber brush
- Leather conditioner (Bick 4 is a solid value-for-money choice)
- Buffing brush (like in this nifty set from JOVITEC)
How to Get Water Stains Out of Leather Shoes
Follow these steps closely. The reason water stains happen is because the water molecules and oils in the leather combine, which causes the natural oils to leave the surface as the water evaporates.
Getting water stains out is easy to do, but it’s important to do it right so that your shoes don’t lose the suppleness that makes them look good, keep them durable, and keep them fitting properly.
Step 1: Absorb Any Excess Water
Using a dry cloth or paper towel, the very first thing you must do is sop up any excess water. If you just get in from the rain and start to see the beginnings of water stains, absorbing as much of the wetness from the leather as possible may just nip potential stains in the bud.
Of course, this requires you being aware that your shoes did get wet, which isn’t always the case. So if you wipe up a small water spill on your office’s kitchen counter, and don’t realize accidental rogue drips on your shoes until much later, move on to step 2.
Step 2: Remove the Laces and Any Dirt or Debris
So let’s say the water stain looks pretty set and dry.
Just so you don’t have anything in the way, take the laces off. Then, bump the soles together to knock off any dirt or debris. As delicately as possible, gently wipe the upper with a soft, microfiber cloth, the same kind you use to wipe glasses lenses.
You’re going to be rubbing a wet cloth on it next. If you don’t get dirt and grains off of the surface now, that next step can scratch your shoes.
Step 3: Dampen Your Cloth
Dip your clean rag or cloth into the bowl of room temperature water. A warmer temperature is better than the ice cold water that initially comes out of a tap, though you want to avoid hot water completely.
Step 4: Rub the Spot Out
Using the wet cloth, rub the stain out. Use gentle, circular motions, and start from the center and move outward. If you’re too aggressive, you can damage the leather.
Avoid using any rags that are tinted or colored since the dye can get on your shoes. Relatedly, avoid using soap. Your shoes aren’t dirty, they’re at the early stages of water damage.
Basically, what you’re doing is un-imbedding the water molecules in the leather by adding fresh ones to draw it out, spread it out, and desaturate the water stain, so it can evaporate cleanly.
Keep a clean, dry rag handy. If the surface gets too damp, you can use the dry rag to absorb excess water. This shouldn’t happen if you’re doing it gently enough, though.
Step 5: Let it Dry (And Let it Be)
The key here is to be patient. Don’t put it under direct sunlight, don’t use a hair dryer, and please don’t throw it in your clothes dryer. That last one should go without saying, by the way.
Just let it sit in a dry, room-temperature environment, and wait it out. Your nice leather footwear deserves your diligence.

Step 6: Repeat Steps 3 Through 5 If Needed
If the stain isn’t mostly gone, you can try rubbing what’s left of it out again. I would avoid doing it a third time in a row without doing Step 7 first, otherwise you’ll risk the leather getting too dry.
Step 7: Condition the Leather
In addition to dispersing all of those concentrated water-hybrid molecules, you also just spent the past six steps drying out the surface of your shoes. No worries though. It’s a necessary evil that’s easily rectified.
The reason that cleaning leather this deeply does that is because its natural oils were extricated from the surface along with the water particles. By using a good leather conditioner like Bick 4, you’re restoring those oils and making the leather supple and strong again.
Apply the conditioner using yet another clean rag. Fortunately, you mastered the proper conditioning technique earlier when you were rubbing the stain out.
Again, you’ll use circular motions starting from the center of where the stain was, and moving outward. This concentrates the conditioner where the most drying out happened.

This is easily one of the best bang for your buck leather conditioners out there. It'll give your leather shoes a facelift without changing the leather color, and because it won't penetrate your leather too deeply you should apply liberally.
Step 8: Buff your Shoes
And finally, using a horsehair brush (this is a good one on Amazon), swiftly swipe the surface of the shoes a few times to buff it and to do away with any excess conditioner. This also allows for even conditioning throughout the shoes.
Leave them for about 30 minutes to let the conditioner do its work.
If you do end up needing to rub out the stain for a third time, give it a day so that the conditioner really seeps into the leather.

This is our go-to shoe brush kit. The bristles and wood are high quality---they've held up well for a few years.
Keep Calm and Clean On
As mentioned, patience is really important here. Even more, you’ll need to keep calm. Trust me, I know how easy it is to panic when you think your nice pair of leather shoes may have been ruined forever.
Unlike a dirt stain that can handle a little more aggression or the use of soaps, getting water stains out requires a touch more delicacy.
Remember to be soft but firm when you’re rubbing the cloth onto the leather, and to make sure you wait out the entire required drying and conditioning times.
Whether your shoes are brown or black or any shade in between, use these steps to keep water stains at bay.
FAQs
Can you fix water stained leather shoes?
Yes, use the steps in this tutorial, starting with absorbing excess water, then using a damp cloth to rub out the stain using circular motions starting from the center. Don’t forget to use leather conditioner or your shoes will dry out.
Are water stains on leather permanent?
No. Unless the stain is really bad and left there for an extended period of time, the concentration of molecules that creates the stain can be dispersed using a damp cloth.
Can you reverse water damage to leather?
Again, it depends on how deep the damage is. A simple water stain can be fixed, but really intense exposure, akin to immersing the shoes in water for a long period of time, can permanently damage any kind of leather.
What does water damage on leather look like?
A water stain looks like a darker, slightly warped spot on the surface of the leather. Really bad water damage can range from more dramatic warping to even brittleness and cracking.

Join the Discussion